If you’ve ever taken on a DIY home improvement project, you know that achieving the perfect wall texture can feel like an uphill battle. One moment, you’re excitedly rolling up your sleeves, ready to transform your space, and the next, you’re grappling with uneven surfaces, drips, and the unsightly results of a spray can gone wrong. It’s at those frustrating moments that you wonder if there’s an easier way to achieve that professional finish without hiring a contractor. That’s where the best texture guns come into play, turning a once tedious task into a smooth and enjoyable process.
Whether you’re a seasoned DIY enthusiast or just starting on your home improvement journey, finding the right texture gun can make all the difference. These tools are designed to simplify the application of various textures, making it accessible for everyone. In this article, we’ll explore the best texture guns on the market, providing you with comprehensive reviews and a buying guide to help you choose the perfect one for your next project. Let’s dive in and discover how these handy gadgets can elevate your wall textures to new heights!
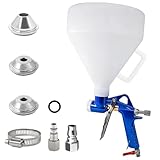
We’ll cover the best texture guns later in this article. Meanwhile, check out these related products on Amazon:


Last update on 2026-07-03 / #ad / Affiliate links / Images from Amazon Product Advertising API
Discovering the Best Texture Guns: Your Ultimate Guide
Have you ever stared at your walls and felt they seemed a tad too plain? You’re not alone! Many homeowners and DIY enthusiasts have the same thought when looking to add a little flair to their spaces. That’s where texture guns come into play. These handy tools take the task of wall finishing to another level, allowing you to create beautiful, textured surfaces that can turn an ordinary room into an extraordinary one. With the right texture gun, you can elevate your painting project, and we’re here to help you navigate through the options to find the best texture guns available.
As you embark on this journey, it might be interesting to know that over 60% of homeowners are opting for textured walls over flat finishes. This trend reflects a growing interest in creating visually appealing environments, with texture being a key element of design. Whether it’s for adding dimension or hiding imperfections, the benefits of textured walls are undeniable. However, while texture can enhance the beauty of your space, the choice of the right tool is crucial to achieving the desired effect. The best texture guns can make all the difference, whether you’re working on a feature wall or simply sprucing up a ceiling.
Now, before you grab the nearest texture gun, you might want to consider the types available. There are various models, from manual spray guns to electric ones, each promising unique advantages. Electric guns, for example, can provide a smooth and consistent finish, making them particularly popular among professionals. On the other hand, manual options offer more control for DIYers who prefer a hands-on approach. Research shows that using the right technique combined with the best texture guns for your projects can save you time and effort while achieving a stunning finish.
In the world of home improvement, the right tools can empower you to unleash your creativity. Investing in quality products not only enhances your skills but also gives your home a fresh and updated look. Armed with knowledge about the best texture guns, you can confidently tackle your next project and turn what once were plain walls into captivating statements. So, roll up your sleeves and get ready—your walls are in for a makeover!
Best Texture Guns – Reviewed
1. Graco 262805 Console Texture Sprayer
I’d always been intimidated by the thought of texture spraying, especially when I saw my friends tackling their home renovations. But once I got my hands on the Graco 262805 Console Texture Sprayer, it felt like I was holding a magic wand! This beauty made those daunting wall textures a breeze. I rolled up my sleeves, set it up, and within minutes was transforming my dull walls into something that looked like it belonged in a magazine. The soft spray pattern was delightfully even, and the adjustable controls made it easy to get just the right amount of texture.
What I love most about this sprayer is how lightweight and manageable it is. My arm didn’t feel like it was falling off even after a couple of hours. Plus, the cleanup was way quicker than I anticipated – no more messy brushes to deal with! I even had some friends over to witness my newfound skills. We were so impressed with the finish that one of them is now planning to borrow it for their own DIY project. Who knew home improvement could be this fun?
2. Fuji 2903-T70 Mini-Mite 3 PLus
When I first saw the Fuji 2903-T70 Mini-Mite 3 PLus, I was skeptical. My home projects typically involved a can of spray paint and a lot of wishful thinking. But the moment I plugged it in, I was hooked. The portability of this sprayer made it easy to move around my home, painting everything from ceilings to walls without feeling like I was lugging around a boulder. The consistent spray pattern gave me the confidence to try out different textures, and I found myself lost in creating customizable patterns.
A standout moment was when I decided to tackle our tired old dining room. The transformation was unbelievable! Instead of the gaudy popcorn texture, I created a smooth, elegant finish that changed the entire vibe of the space. The Fuji sprayer comes with different nozzles, which means I could easily switch styles depending on my mood or the room. Seeing my family’s surprise when they walked in made all the effort worth it, and I’ve already got a list of more rooms to revamp!
3. Wagner 0529097 Double Duty Paint Sprayer
After my last attempt at painting turned into a colorful disaster, I was hesitant to dive back into home improvement. That’s when a friend recommended trying the Wagner 0529097 Double Duty Paint Sprayer. I thought, “Why not?” Let me tell you, this sprayer was my saving grace. It made the process feel less like a chore and more like an art project. I was amazed at how easily it sprayed both paint and texture, giving me the freedom to express my creative side in ways I never imagined.
I specifically recall using it for a DIY accent wall in my living room. The textures came out so beautifully that I couldn’t stop smiling as I stepped back to admire my work. Cleanup was equally easy, which is a big deal for someone like me who tends to procrastinate on tasks like that. Now, I find myself encouraging others to take the leap and explore their DIY dreams. It’s incredible how a tool can empower you to transform your space and boost your confidence at the same time.
4. HomeRight C800971.a Paint Sprayer
Using the HomeRight C800971.a Paint Sprayer felt like stepping into a whole new world of creativity! I’ll admit, my first attempt wasn’t perfect, but the ease of use kept me motivated. It quickly realized that I had more control over texture than I ever thought possible. I remember standing there, aiming at my old wooden chair, and in moments, it transformed into a beautifully distressed piece that was a hit at my next gathering. Guests couldn’t believe I created it myself!
What stands out about the C800971.a is how quick it made projects come to life. I find that I’m now looking for new items to revamp, and my to-do list has turned into a wish list! This tool has redefined my approach to home decor and sparked my creativity. It’s so satisfying to see that knack for DIY projects flourish, and I can’t wait to share this joy with friends, inviting them to join me for crafting weekends!
5. Titan Tools 05130 Texture Sprayer
You know when you stumble upon a hidden gem? That’s how I felt when I discovered the Titan Tools 05130 Texture Sprayer. Initially, I was drawn to how compact it looked, thinking it couldn’t possibly match my bigger tools, but boy, was I wrong! Using it to give our garage a fresh, textured finish was so straightforward. The first spray applied effortlessly, and I was immediately enchanted by how it evenly distributed the texture. My old garage was unrecognizable, and my family couldn’t wait to start using the space again!
What makes this texture gun a winner for me is its versatility. I used it for everything from ceilings to walls, and it really delivers a professional finish without the fuss. Plus, it hardly requires any setup time. After finishing, I felt accomplished, not to mention the compliments poured in from neighbors who couldn’t believe I’d done it myself. It sparked a whole new confidence in me, and I can’t stop dreaming about my next project! Thank you, Titan, for turning a simple task into a rewarding experience.
Why Do People Need to Buy Texture Guns?
In the world of home improvement, achieving a professional finish can often feel out of reach without the right tools. Enter the texture gun! For anyone taking on DIY projects, whether it’s rejuvenating a tired living room or transforming a basement, a texture gun can be a game-changer. Imagine finishing a wall with that perfect, even texture, creating a look that rivals what you’d find in any home improvement store. With a texture gun, your walls can sport a beautiful finish that adds depth and character to any space, making your home truly one-of-a-kind.
Not only do texture guns simplify the application process, but they also allow for a variety of textures that can enhance your décor. Think about your upcoming renovation project. Maybe you’re considering a knockdown texture for that trendy, rustic vibe, or perhaps a popcorn finish that evokes a cozy feeling in your family room. Using a texture gun, you can effortlessly achieve these looks, customizing them to your personal style. Imagine being able to walk into your freshly updated space and feel proud of the work you’ve accomplished all on your own!
Another great advantage of investing in one of the best texture guns is their efficiency. Many traditional methods of texturing require hours of painstaking work and often lead to wasted materials. With a texture gun, you can cover large areas quickly and with precision, allowing you to focus on other aspects of your project. You might be hosting friends for an upcoming event, and wouldn’t it be great to finish that wall before they arrive? A texture gun makes that possible, giving you the ability to complete your projects in record time without sacrificing quality.
Ultimately, owning a texture gun doesn’t just elevate your DIY game; it can also save you money in the long run. Hiring professional help for texturing can be quite costly, and with a texture gun, you can deliver high-quality finishes on your own. Plus, it opens up a world of possibilities for future projects. No longer will you have to reserve texturing as a job for the professionals; you can take on projects whenever inspiration strikes! So, investing in a good texture gun not only enhances your home but also empowers you as a creator, giving you the confidence to tackle any wall with flair.
Understanding Different Texture Techniques
When it comes to achieving the perfect finish on your walls or ceilings, understanding the various texture techniques is essential. Each technique creates a distinct look and feel that can enhance the overall aesthetic of a room. Popular techniques like knockdown, slap brush, and spray-on textures each have their unique characteristics and applications. For example, a knockdown finish offers a more sophisticated look, making it ideal for modern homes, while the slap brush technique adds a rustic, cozy vibe that suits traditional decor.
Selecting the right method can dramatically change how a space feels. Imagine walking into a room with a sleek knockdown texture—it’s smooth and less prone to collecting dust compared to a more textured finish. If you’re trying to create an inviting atmosphere in a living room, you might prefer the warmer feeling of a slap brush texture. Therefore, understanding these techniques not only helps you choose the right texture gun but also ensures you achieve the desired style for your space.
You should also consider the practicality of each method. For instance, some textures might require more experience and skill to apply effectively. If you are a DIY enthusiast attempting a weekend project, it might be more practical to stick with a spray texture for ease. Knowing the nuances behind each method will allow you to find the best fit for your project, making it crucial before diving into your next painting venture.
Maintenance Tips for Your Texture Gun
Now that you’ve acquired a texture gun, it’s essential to keep it in top shape to ensure it continues to perform at its best. Regular maintenance not only prolongs the life of the tool but also ensures quality results every time you use it. After each project, remember to clean the gun thoroughly. The buildup of dried texture compound can clog the nozzle and hinder performance, leading to frustrating, uneven finishes in future applications.
Cleaning your texture gun doesn’t have to be cumbersome. Start by disassembling the components and soaking them in warm, soapy water if you’ve used a water-based texture. For oil-based compounds, a solvent cleaner will do. Once cleaned, dry all parts thoroughly before reassembling. This routine not only maintains functionality but also prepares the gun for your next creative undertaking, ensuring that you can jump straight into the action without any delays.
Moreover, periodically inspect the seals and connectors of your texture gun. Over time, wear and tear can affect how well your gun operates, leading to inconsistencies in spraying. Regular checks allow you to replace worn-out parts before they fail during a project, saving you time and the potential headache of unexpected interruptions. In short, taking good care of your texture gun can keep it in prime condition and ready for your artistic endeavors.
Where to Use Texture Guns Effectively
When it comes to texture guns, knowing where to put them to good use is just as important as having the right tool. Texturing can dramatically improve not only interior walls and ceilings but can also be applied to exterior surfaces, giving a unique character to your home’s façade. For example, applying a stucco texture outside can enhance curb appeal and significantly affect how your property looks from the street.
In addition to surfaces, consider the specific rooms where texture guns can work wonders. A bathroom may benefit from a moisture-resistant spray texture that can handle high humidity levels, while a living room or entryway might lend itself to a more decorative design. Visualizing where and how you want to apply texture can help you tailor your decisions, leading to a more coherent design throughout your home.
Furthermore, have fun with experimentation! Texturing doesn’t have to be limited to walls and ceilings; think beyond traditional uses. Consider applying textured finishes to furniture pieces or accent walls to create visual interest without overwhelming the space. Each project offers a chance to express your creativity, so don’t shy away from using texture guns as a versatile tool in your home improvement routine.
Common Mistakes to Avoid When Using a Texture Gun
Even with all the right tools, mistakes can easily happen if you’re not careful when using a texture gun. One common blunder is not preparing the surface adequately. If you fail to clean or prime the surface before applying texture, you may end up with uneven finishes or areas where the texture peels away. To avoid this, take the time to properly prepare your walls; this step is crucial for a long-lasting and professional-looking outcome.
Another mistake many make revolves around the mixing of the texture compound. Failing to achieve the right consistency can lead to either a lumpy finish or a runny texture that won’t adhere properly. Always follow the manufacturer’s instructions and consider testing a small area before tackling the full project. This precaution can save you hours of work and disappointment later on—there’s a good chance you wouldn’t want to redo the living room ceiling after an unsatisfactory result!
Lastly, also be conscious about your technique and application. Spraying too close or too fast can create inconsistent patterns and overspray, which could impact your project’s quality. Practice on a scrap piece or an inconspicuous area to get a feel for your strokes and the distance required from the surface to achieve what you envision. Being mindful of these common mistakes can elevate your texturing skills, allowing you to create beautiful spaces that reflect your personal style without the hassle.
Best Texture Guns: The Ultimate Buying Guide
Hey there, my friend! If you’re diving into the world of home improvement and decor, you might be on the lookout for the best texture guns to achieve that perfect finish. Whether you’re looking to add a little character to your walls or repair some old texture, a good texture gun is an invaluable tool. With countless options available, it can be overwhelming to know where to start. But don’t worry, I’m here to help you navigate through this fun project and find the right texture gun for your needs. Let’s chat about some key factors to consider when shopping for your new best friend in wall texturing!
1. Type of Texture You Want to Achieve
The first and foremost thing to think about is the type of texture you’re aiming for. Are you looking for a knockdown, splatter, popcorn, or maybe a smooth finish? Each texture gun can produce a different look, and not every gun is designed for all types of textures. It’s super important to know what you want before you make that purchase.
If you’re after a subtle knockdown texture, for example, you’ll need a gun that can handle thicker mixtures. Conversely, if you want to create a fine mist for a more delicate splatter finish, then you’d prefer a finer nozzle. So, take a moment to envision the end result and choose a texture gun that aligns with your vision!
2. Ease of Use
Nobody wants to wrestle with a complicated tool when you’re just trying to spruce up your walls. Look for texture guns that boast user-friendly designs and don’t require a degree in engineering to operate! Many of the best texture guns come with straightforward instructions and ergonomic features that make them easier to handle.
Before you buy, consider visiting a local store to get a feel for the texture gun. A comfortable grip and balance can make all the difference, especially if you have a larger project ahead. A gun that feels good in your hands can lead to better results and more enjoyable work time!
3. Compatibility with Materials
Different texture guns work best with different types of materials. For instance, if you’re going to use a thicker material like joint compound, you’ll need a gun that can handle it without clogging or jamming. Be sure to check the specifications to see what materials the texture gun is designed to work with.
On the flip side, if you plan on using lighter materials, such as premixed texture sprays, make sure the gun is compatible as well. It’s like getting the right shoes for the occasion—having the right tool for the job makes everything go smoother. So, do your homework on this one!
4. Adjustable Settings
Having adjustable settings on your texture gun can significantly enhance your control over the application. Look for models that allow you to configure settings like pressure, spray width, and texture density. This will let you fine-tune your work based on the specific look you want to achieve or the nature of the surface you’re working on.
Being able to switch up the settings can make your projects versatile. For example, if you’re working in cramped spaces or on smaller areas, a narrower spray pattern can help you avoid overspray. Having those choices can make your DIY adventure much more manageable and fun!
5. Build Quality and Durability
Think about the long-term investment you’re making with a texture gun. You’ll want to ensure your chosen model is constructed from quality materials that can withstand regular use without becoming a flimsy tool in your hands. Cheaper models may be tempting, but they can often lead to frustration if they wear out quickly. Look for something that feels sturdy and robust.
Buying a durable texture gun also means you can take on various projects over time, making it a worthy companion for future DIY endeavors. Check reviews or ask around to see which brands are known for making the most reliable texture guns. You want one that can stand the test of time just like a good friendship!
6. Cleaning and Maintenance
Let’s be real—nobody enjoys cleaning tools after a hard day of work. A texture gun that’s difficult to clean can lead to excessive frustration and wasted time. Look for designs that are easy to disassemble and clean after use. Some models feature removable parts that can quickly be rinsed or wiped down, making your life a lot easier.
Consider how often you plan to use the gun. If you’re going to be texturing frequently, a model that simplifies maintenance could save you a lot of headaches in the long run. Plus, a well-maintained texture gun will perform better and last longer, and who doesn’t want that? So, remember to check how easy it is to clean before you commit!
7. Price and Budget
Last but not least, let’s talk about the budget! Texture guns can vary widely in price, so it’s important to set a realistic budget before you start looking. Just because something is on the pricier side doesn’t always mean it’s the best choice for you; it’s more about what fits your needs. Sometimes the most expensive gun may offer features you won’t even use!
Consider not just the initial cost, but also the potential saving on future professional texture jobs if you invest in a solid tool. Check out your options in the mid-range price category; usually, you can find quality texture guns that won’t break the bank while also snagging some great features. Remember, the key is to strike a balance between cost, quality, and what meets your specific needs.
So, there you have it! When you’re ready to shop for the best texture guns, keep these factors in mind, and you’ll be well-equipped to make an informed decision. Happy texturing, and may your DIY projects turn out beautifully!
FAQ
What is a texture gun, and why do I need one?
A texture gun is a specialized tool designed to apply various texture patterns to walls and ceilings using materials like joint compound or spray texture. If you’re looking to add some character and style to your interior or exterior surfaces, a texture gun can help you achieve a professional-looking finish without the need for extensive experience. It’s a handy tool for DIY enthusiasts and professionals alike, making it easier to get creative with your home decor.
Having a texture gun can save you both time and money. Instead of hiring a professional or manually applying texture with a brush or roller, you can achieve consistent results quickly. It allows for a wide range of textures, from knockdown to popcorn finishes, all in one device. Whether you’re patching up areas, renovating, or just looking to refresh your space, a texture gun is a practical addition to your toolkit.
How do I choose the right texture gun for my needs?
Choosing the right texture gun depends largely on your specific projects and preferences. Start by considering the types of textures you’re most interested in creating. Some guns are versatile and can handle various textures, while others may specialize in a particular style, like knockdown or stucco. Additionally, think about the capacity of the gun; if you have large areas to cover, a higher-capacity gun can help you work more efficiently.
It’s also important to evaluate the construction and ease of use. Look for guns that are made from durable materials and are comfortable to hold, as you’ll want something ergonomic, especially for larger projects. Don’t forget to check out user reviews and ratings to see how others have fared with different models. This will give you insights into performance, reliability, and any potential issues, making your decision easier.
Can I use a texture gun indoors and outdoors?
Absolutely! Texture guns are quite versatile and can be used both indoors and outdoors, but there are a few things to keep in mind. For indoor use, make sure the area is well-ventilated to avoid inhaling any dust or fumes from the materials you’re working with. If you’re using heavy textures, ensure the surfaces are clean and well-prepared to achieve the best results.
When working outdoors, consider the weather conditions. It’s best to avoid using your texture gun in windy or rainy weather, as this can affect the application and drying process. Ensure the surface is adequately primed to support the texture you’re applying. By keeping these factors in mind, you can confidently use your texture gun in various environments to enhance your space.
What type of texture material can I use with a texture gun?
Texture guns can accommodate several materials, with joint compound being one of the most common options. This versatile material is easy to apply and can be mixed to achieve different consistencies, allowing you to create various textures. Additionally, specialized texture materials designed for spray applications, like premixed texture compounds and popcorn texture, can also work well with texture guns.
Before using any material, be sure to read the manufacturer’s guidelines for compatibility. Some texture guns may also come with specific recommendations for the types of materials they work best with. Experimenting with different compounds can be fun, as it allows you to find the perfect texture for your style, whether you’re going for a modern aesthetic or a classic finish.
How do I clean and maintain my texture gun?
Cleaning your texture gun after each use is essential to keep it in good working condition and to ensure it performs well in future projects. Most manufacturers recommend rinsing it out with water if you’ve been using water-based products, ensuring that there is no residue left in the nozzle or container. For best results, disassemble the gun as per the manufacturer’s instructions and scrub each part with a brush to dislodge any stubborn material.
Routine maintenance doesn’t stop at cleaning, though! It’s also a good idea to check for wear and tear, ensuring that all components are functioning correctly. Replace any worn-out parts as needed to avoid issues during your next project. Regular upkeep not only maximizes the lifespan of your texture gun but also ensures that the performance remains top-notch, making each application smooth and efficient.
Are texture guns difficult to use for beginners?
Not at all! While using a texture gun might seem intimidating at first, most models are designed with user-friendliness in mind. Many texture guns come with straightforward instructions and can be quickly learned with a little practice. Start with small test areas to get comfortable with the trigger and pressure controls. Soon enough, you’ll find your rhythm and be spraying textures like a pro!
For added confidence, consider watching tutorial videos or reading guides on the specific techniques you want to master. Practicing on scrap materials or less visible areas will help you perfect your technique without the pressure of a big project. Embrace any mistakes as learning experiences, and soon you’ll be creating textured surfaces that enhance your space beautifully.
How long does it take for the texture to dry once applied?
The drying time for texture can vary based on a few factors, including the type of material used, the thickness of the application, and the environmental conditions in the room. Generally, most texture finishes take around 24 hours to fully dry before you can begin painting or applying any additional layers. However, in humid conditions or if the texture is applied thickly, it may take longer.
To ensure the best results, keep the temperature and humidity levels in mind when working with texture materials. A well-ventilated space with moderate temperatures can help speed up the drying process. Additionally, check the specific drying times recommended by the manufacturer of the texture material you’re using. Remember, patience is key; allowing the texture to dry thoroughly will ensure a lasting and beautiful finish.
Final Thoughts
In your quest for the best texture guns, remember that the right tool can transform not only your projects but also your confidence in tackling DIY tasks. You’ve explored the ins and outs of various options, weighing features, benefits, and user experiences. Now it’s time to bring your newfound knowledge to life! Whether you’re revamping a room or getting crafty with creative projects, these tools are designed to enhance your skills and unleash your creativity.
So go ahead, take that leap! Armed with the insights from this guide, you can confidently choose the perfect texture gun that suits your needs. Imagine the satisfaction of achieving professional-grade results right in your own home. The possibilities are endless, and your newfound passion for DIY awaits. Embrace the journey, and let your creativity shine with the best texture guns at your side!