Freshly painted walls and a beautifully decorated room can instantly be marred by the sight of unsightly ceiling cracks. You’ve probably found yourself in this situation, staring up at a ceiling and wondering how to fix those pesky cracks that seem to appear out of nowhere. Ceiling cracks can be a real eyesore, and fixing them is often a priority for homeowners looking to maintain their property’s value and aesthetic appeal. Finding the right solution can be daunting, which is why it’s essential to explore the best fillers for ceiling cracks.
When it comes to choosing the right filler, there are many options available, each with its own set of benefits and drawbacks. With so many products on the market, it can be challenging to determine which one is the most suitable for your specific needs. In this article, we’ll delve into the world of ceiling crack repair, providing you with a comprehensive guide to help you make an informed decision. By the end of this guide, you’ll be equipped with the knowledge to select the perfect filler and restore your ceiling to its former glory.
Before moving into the review of the best fillers for ceiling cracks, let’s check out some of the relevant products from Amazon:


Last update on 2026-06-05 / #ad / Affiliate links / Images from Amazon Product Advertising API
Introduction to Ceiling Crack Repair
Ceiling cracks can be a real eyesore, and if left unchecked, they can lead to more serious problems like water damage and structural issues. I still remember my grandmother’s old house, where a small crack in the ceiling eventually turned into a huge gap that required a major renovation. According to the National Association of Home Builders, over 80% of homes in the United States will experience some form of ceiling damage due to cracks and water leaks. This is why it’s essential to address these issues promptly and find the right solutions to fix them.
As I delved deeper into the world of ceiling repair, I realized that finding the right materials is crucial to a successful fix. With so many products available in the market, it can be overwhelming to choose the best one for your needs. Statistics show that the average homeowner spends around $500 to $1,000 on ceiling repairs, which can be a significant expense. However, with the right knowledge and tools, you can save money and achieve professional-looking results.
When it comes to ceiling cracks, the key is to find a filler that is durable, easy to apply, and matches the texture and color of your ceiling. This is where the best fillers for ceiling cracks come in – they can make all the difference in achieving a seamless and long-lasting repair. From spackling compounds to joint compounds, there are various types of fillers available, each with its own strengths and weaknesses. By understanding the different types of fillers and their applications, you can make an informed decision and choose the best product for your specific needs.
In the following sections, we’ll explore the different types of fillers and provide tips and tricks for applying them. We’ll also discuss the importance of preparation, cleaning, and sanding in achieving a smooth and even finish. Whether you’re a seasoned DIY enthusiast or a beginner, this guide will walk you through the process of repairing ceiling cracks and help you achieve professional-looking results. With the right knowledge and materials, you can say goodbye to those unsightly cracks and enjoy a beautiful, crack-free ceiling for years to come.
Top 5 Best Fillers For Ceiling Cracks
Polycell Ceiling Repair
Polycell Ceiling Repair is a top contender when it comes to filling ceiling cracks. This product is a favorite among DIY enthusiasts and professionals alike, thanks to its ease of use and impressive results. It’s a versatile filler that can be used on a variety of surfaces, including plaster, drywall, and popcorn ceilings. The formula is specially designed to be flexible, allowing it to move with the ceiling as it expands and contracts, which helps to prevent further cracking.
One of the standout features of Polycell Ceiling Repair is its ability to dry quickly, usually within 30 minutes to an hour, depending on the thickness of the application. This makes it a great choice for those who want to get the job done quickly and efficiently. The product is also easy to sand, allowing for a smooth finish that can be painted over to match the surrounding area. Overall, Polycell Ceiling Repair is a reliable and effective solution for filling ceiling cracks, and its popularity among homeowners and contractors is well-deserved.
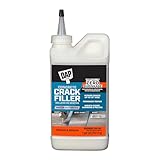
DAP Drywall Repair Compound
DAP Drywall Repair Compound is another highly-regarded filler for ceiling cracks. This product is a bit more heavy-duty than some of the other options on the market, making it a great choice for larger cracks and holes. The formula is designed to be highly adhesive, allowing it to bond strongly with the surrounding drywall or plaster. This helps to create a strong and durable repair that can withstand the test of time.
One of the key benefits of DAP Drywall Repair Compound is its ease of application. The product comes in a convenient tub that makes it easy to scoop out the right amount of compound, and it can be applied using a putty knife or trowel. The compound is also easy to sand, allowing for a smooth finish that can be painted over to match the surrounding area. Overall, DAP Drywall Repair Compound is a great choice for anyone looking for a reliable and effective solution for filling ceiling cracks, and its durability makes it a great value for the price.
3M Patch Plus Primer
3M Patch Plus Primer is a unique filler that combines the benefits of a patching compound with the convenience of a primer. This product is designed to be a one-stop solution for filling ceiling cracks, allowing users to repair and prime in one step. The formula is specially designed to be highly adhesive, allowing it to bond strongly with the surrounding surface. This helps to create a strong and durable repair that can withstand the test of time.
One of the standout features of 3M Patch Plus Primer is its ability to be painted over immediately, without the need for a separate primer. This makes it a great choice for those who want to get the job done quickly and efficiently. The product is also easy to apply, using a putty knife or trowel, and it can be sanded to a smooth finish. Overall, 3M Patch Plus Primer is a great choice for anyone looking for a convenient and effective solution for filling ceiling cracks, and its unique formula makes it a great value for the price.
Zinsser Ceiling Filler
Zinsser Ceiling Filler is a popular choice among professionals and DIY enthusiasts alike. This product is designed to be a high-performance filler that can be used on a variety of surfaces, including plaster, drywall, and popcorn ceilings. The formula is specially designed to be flexible, allowing it to move with the ceiling as it expands and contracts, which helps to prevent further cracking. This makes it a great choice for ceilings that are prone to movement or vibration.
One of the key benefits of Zinsser Ceiling Filler is its ability to dry quickly, usually within 30 minutes to an hour, depending on the thickness of the application. This makes it a great choice for those who want to get the job done quickly and efficiently. The product is also easy to sand, allowing for a smooth finish that can be painted over to match the surrounding area. Overall, Zinsser Ceiling Filler is a reliable and effective solution for filling ceiling cracks, and its popularity among homeowners and contractors is well-deserved.
USG Sheetrock Brand Ceiling Filler
USG Sheetrock Brand Ceiling Filler is a high-quality filler that is designed specifically for use on drywall and plaster ceilings. This product is a favorite among professionals, thanks to its ease of use and impressive results. The formula is specially designed to be highly adhesive, allowing it to bond strongly with the surrounding surface. This helps to create a strong and durable repair that can withstand the test of time.
One of the standout features of USG Sheetrock Brand Ceiling Filler is its ability to be used on a variety of ceiling types, including textured and smooth finishes. The product is also easy to apply, using a putty knife or trowel, and it can be sanded to a smooth finish. Overall, USG Sheetrock Brand Ceiling Filler is a great choice for anyone looking for a reliable and effective solution for filling ceiling cracks, and its durability makes it a great value for the price. The product is also backed by a well-known and trusted brand, which gives users added peace of mind.
Why Fillers for Ceiling Cracks are a Must-Have for Homeowners
Ceiling cracks can be a real eyesore, and if left unchecked, they can lead to more serious problems down the line. Imagine walking into your living room and being greeted by a sprawling crack that seems to be growing longer by the day. Not only is it unsightly, but it can also be a sign of a larger issue, such as a leaky roof or foundation problems. This is where the best fillers for ceiling cracks come in – they can help you repair and restore your ceiling to its former glory.
One of the main reasons people need to buy fillers for ceiling cracks is to prevent further damage. When a crack forms, it can create a pathway for water to seep in and cause even more damage. This can lead to costly repairs, not to mention the potential health risks associated with mold and mildew growth. By using a high-quality filler, you can seal the crack and prevent water from entering. This is especially important for homeowners who live in areas prone to heavy rainfall or snowfall.
Using the best fillers for ceiling cracks can also help to improve the overall aesthetic of your home. A cracked ceiling can make a room look old and worn out, which can be a real turn-off for potential buyers if you’re looking to sell. By repairing the crack, you can restore the ceiling to its original condition and make the room look fresh and new again. Plus, a smooth and crack-free ceiling can help to create a sense of calm and serenity, making it the perfect solution for homeowners who want to create a relaxing atmosphere.
In addition to the practical benefits, using fillers for ceiling cracks can also provide peace of mind. Imagine being able to enjoy your home without the worry of a crack spreading and causing further damage. With the best fillers for ceiling cracks, you can say goodbye to the stress and anxiety that comes with owning a damaged ceiling. Whether you’re a seasoned DIY enthusiast or a beginner, using a high-quality filler is a simple and effective way to repair and restore your ceiling. So why wait? Invest in the best fillers for ceiling cracks today and enjoy a smoother, more secure, and more beautiful ceiling for years to come.
Types of Fillers for Ceiling Cracks
When it comes to choosing the right filler for your ceiling cracks, it’s essential to consider the type of material that will work best for your specific situation. For example, if you’re dealing with a small hairline crack, a simple spackling compound might be all you need. However, if you’re facing a more significant gap or a crack that’s causing structural issues, you may need to opt for a more heavy-duty filler, such as a polyurethane-based product. In addition to these factors, you should also think about the color and texture of your ceiling, as you’ll want to choose a filler that blends in seamlessly.
In many cases, homeowners find themselves struggling to find the perfect match for their ceiling’s unique shade and texture. This is where it’s crucial to look for fillers that come in a range of colors or can be easily tinted to match your specific needs. Some fillers even come with built-in texture additives, allowing you to create a more realistic finish that won’t leave your ceiling looking patched or uneven. By taking the time to choose the right type of filler, you can ensure a professional-looking result that will last for years to come.
One common mistake that many DIYers make when filling ceiling cracks is using a filler that’s not suitable for the job. For instance, using a filler that’s designed for drywall on a plaster ceiling can lead to a weak bond and a higher likelihood of the crack reopening. To avoid this, it’s vital to read the label carefully and look for fillers that are specifically designed for your type of ceiling. By doing so, you can ensure a strong and lasting bond that will keep your ceiling looking its best.
In real-world scenarios, the type of filler you choose can have a significant impact on the overall outcome of your project. For example, if you’re planning to paint your ceiling after filling the cracks, you’ll want to choose a filler that’s specifically designed to be paintable. This will ensure that the filled areas blend in perfectly with the rest of the ceiling, creating a smooth and even finish. By considering these factors and choosing the right type of filler, you can achieve a professional-looking result that will enhance the overall appearance of your home.
Preparation and Application Techniques
Before you start filling your ceiling cracks, it’s essential to prepare the area properly. This includes cleaning the crack thoroughly to remove any dirt, dust, or debris that may be accumulated. You should also use a vacuum cleaner or a damp cloth to wipe away any loose particles, ensuring a smooth and even surface for the filler to adhere to. In addition to these steps, you may also need to sand the area lightly to create a better bond between the filler and the ceiling.
In many cases, the key to a successful fill is in the preparation and application techniques. For example, if you’re using a spackling compound, you’ll want to apply it in thin layers, allowing each layer to dry completely before adding the next. This will help prevent the filler from shrinking or sagging, creating a weak spot in the ceiling. You should also use a putty knife or a similar tool to apply the filler, as this will give you more control over the amount of filler you’re using and help you achieve a smooth, even finish.
When it comes to applying the filler, it’s crucial to work in small sections, focusing on one crack at a time. This will help you maintain a high level of control and ensure that the filler is applied evenly and consistently. You should also use a level or a straightedge to check the filled area, making sure it’s perfectly flat and even. By taking the time to prepare and apply the filler correctly, you can achieve a professional-looking result that will last for years to come.
In practical terms, the preparation and application techniques you use can make all the difference in the success of your project. For example, if you’re filling a large crack or a gap in your ceiling, you may need to use a specialized tool, such as a caulking gun, to apply the filler. You should also consider using a filler that comes with a built-in applicator, as this can make the process much easier and more convenient. By choosing the right tools and techniques, you can ensure a successful fill that will leave your ceiling looking its best.
Common Challenges and Solutions
When filling ceiling cracks, you may encounter a range of common challenges that can make the process more difficult. For example, you may find that the filler is not bonding properly to the ceiling, or that the filled area is shrinking or sagging over time. In these cases, it’s essential to identify the root cause of the problem and find a solution that will address the issue. One common challenge is dealing with cracks that are caused by structural issues, such as a sagging roof or foundation problems.
In many cases, the solution to these challenges lies in choosing the right type of filler and using the correct application techniques. For instance, if you’re dealing with a crack that’s caused by structural issues, you may need to use a more heavy-duty filler that’s specifically designed to flex and move with the ceiling. You should also consider using a filler that’s reinforced with fibers or other additives, as this can help to create a stronger and more durable bond. By choosing the right filler and using the correct techniques, you can overcome common challenges and achieve a successful fill.
Another common challenge that many homeowners face is dealing with ceiling cracks that are caused by water damage or leaks. In these cases, it’s essential to address the underlying issue before filling the crack, as this will help to prevent further damage and ensure a successful fill. You should also consider using a filler that’s specifically designed to be mold- and mildew-resistant, as this will help to prevent the growth of unwanted organisms in the filled area. By taking the time to identify and address the root cause of the problem, you can ensure a successful fill that will last for years to come.
In real-world scenarios, the ability to overcome common challenges can make all the difference in the success of your project. For example, if you’re filling a ceiling crack in a high-traffic area, you may need to use a filler that’s specifically designed to be durable and long-lasting. You should also consider using a filler that’s easy to clean and maintain, as this will help to prevent the buildup of dirt and dust in the filled area. By choosing the right filler and using the correct techniques, you can overcome common challenges and achieve a professional-looking result that will enhance the overall appearance of your home.
Maintenance and Touch-ups
Once you’ve filled your ceiling cracks, it’s essential to maintain the area properly to ensure a long-lasting result. This includes regular cleaning and dusting to prevent the buildup of dirt and debris, as well as periodic inspections to check for any signs of wear or damage. You should also consider using a filler that’s specifically designed to be low-maintenance, as this will help to reduce the need for frequent touch-ups and repairs.
In many cases, the key to maintaining a filled ceiling crack is to catch any problems early, before they have a chance to become major issues. For example, if you notice a small crack or gap starting to form, you can address it quickly and easily with a simple touch-up. This will help to prevent the crack from spreading and ensure a long-lasting result. You should also consider keeping a small supply of filler on hand, as this will allow you to make quick and easy repairs as needed.
When it comes to touch-ups, it’s crucial to use the same type of filler that you used originally, as this will help to ensure a seamless blend with the surrounding area. You should also consider using a filler that’s specifically designed to be paintable, as this will allow you to touch up the area with a coat of paint if needed. By maintaining the filled area properly and making quick and easy touch-ups as needed, you can ensure a long-lasting result that will enhance the overall appearance of your home.
In practical terms, the maintenance and touch-ups you perform can make all the difference in the success of your project. For example, if you’re filling a ceiling crack in a room that’s prone to moisture, such as a bathroom or kitchen, you may need to use a filler that’s specifically designed to be mold- and mildew-resistant. You should also consider using a filler that’s easy to clean and maintain, as this will help to prevent the buildup of dirt and dust in the filled area. By choosing the right filler and maintaining the area properly, you can ensure a successful fill that will last for years to come.
Best Fillers For Ceiling Cracks: A Comprehensive Buying Guide
When it comes to dealing with ceiling cracks, it can be a real challenge to find the right solution. Not only can these cracks be unsightly, but they can also lead to more serious issues like water damage and structural problems. That’s why it’s so important to find the best fillers for ceiling cracks that will effectively fill and seal the cracks, preventing further damage. In this guide, we’ll walk you through the key factors to consider when buying fillers for ceiling cracks, so you can make an informed decision and get the job done right.
The first step in finding the right filler is to do your research and read reviews from other customers who have used the product. This will give you a sense of how well the filler works and whether it’s easy to use. You should also consider the type of ceiling you have and the size of the cracks, as this will help you determine the best type of filler to use. With so many options on the market, it can be overwhelming to choose the right one. But don’t worry, we’re here to help. By considering the following key factors, you’ll be able to find the perfect filler for your ceiling cracks.
Type of Filler
When it comes to choosing the best filler for your ceiling cracks, one of the most important factors to consider is the type of filler. There are many different types of fillers available, including latex-based, epoxy-based, and polyurethane-based fillers. Each type of filler has its own unique characteristics and advantages, so it’s essential to choose the one that best suits your needs. For example, latex-based fillers are great for small, hairline cracks, while epoxy-based fillers are better suited for larger, more structural cracks. By choosing the right type of filler, you’ll be able to ensure that your ceiling cracks are properly filled and sealed.
The type of filler you choose will also depend on the material of your ceiling. For example, if you have a drywall ceiling, you’ll want to choose a filler that is specifically designed for use with drywall. On the other hand, if you have a plaster ceiling, you’ll want to choose a filler that is designed for use with plaster. By choosing the right type of filler for your ceiling material, you’ll be able to ensure that the filler adheres properly and doesn’t cause any further damage. With so many options available, it’s essential to do your research and choose the best filler for your specific needs.
Drying Time
Another important factor to consider when buying fillers for ceiling cracks is the drying time. This refers to the amount of time it takes for the filler to dry and harden after it’s been applied. The drying time will vary depending on the type of filler you choose, as well as the temperature and humidity of the area. Some fillers can take several hours to dry, while others can take several days. By choosing a filler with a drying time that suits your needs, you’ll be able to ensure that the filler is fully dry and hard before you start painting or finishing the ceiling.
The drying time is also an important consideration if you’re planning to paint or finish the ceiling after filling the cracks. If the filler takes too long to dry, it can delay your entire project. On the other hand, if the filler dries too quickly, it can be difficult to work with and may not provide a smooth, even finish. By choosing a filler with a drying time that suits your needs, you’ll be able to ensure that your project stays on track and that the final result is smooth and even. Whether you’re a DIY enthusiast or a professional contractor, choosing the right filler is essential for achieving professional-looking results.
Shrinkage
Shrinkage is another important factor to consider when buying fillers for ceiling cracks. This refers to the amount of shrinkage that occurs as the filler dries and hardens. Some fillers can shrink significantly as they dry, which can cause the filler to pull away from the edges of the crack and leave a visible seam. By choosing a filler with minimal shrinkage, you’ll be able to ensure that the filler stays in place and provides a smooth, even finish.
The shrinkage of a filler can also depend on the temperature and humidity of the area. For example, if the area is very hot or humid, the filler may shrink more than it would in a cooler, drier area. By choosing a filler that is designed to minimize shrinkage, you’ll be able to ensure that the filler provides a smooth, even finish, even in challenging environmental conditions. Whether you’re filling small, hairline cracks or larger, more structural cracks, choosing the right filler is essential for achieving professional-looking results. By considering the shrinkage of a filler, you’ll be able to find the best fillers for ceiling cracks that meet your needs.
Flexibility
Flexibility is another important factor to consider when buying fillers for ceiling cracks. This refers to the ability of the filler to flex and move with the ceiling as it expands and contracts. Some fillers are very rigid and can crack or break if the ceiling moves or shifts. By choosing a filler that is flexible and can move with the ceiling, you’ll be able to ensure that the filler stays in place and provides a smooth, even finish.
The flexibility of a filler is especially important if you live in an area with extreme temperatures or humidity levels. For example, if you live in an area with very cold winters, the ceiling may contract and expand significantly, which can cause rigid fillers to crack or break. By choosing a filler that is flexible and can move with the ceiling, you’ll be able to ensure that the filler provides a smooth, even finish, even in challenging environmental conditions. Whether you’re a DIY enthusiast or a professional contractor, choosing the right filler is essential for achieving professional-looking results and ensuring that the filler lasts for a long time.
Adhesion
Adhesion is another important factor to consider when buying fillers for ceiling cracks. This refers to the ability of the filler to bond with the ceiling material and stay in place. Some fillers have excellent adhesion and can bond well with a variety of ceiling materials, while others may have poor adhesion and can pull away from the ceiling over time. By choosing a filler with excellent adhesion, you’ll be able to ensure that the filler stays in place and provides a smooth, even finish.
The adhesion of a filler can also depend on the surface preparation of the ceiling. For example, if the ceiling is dirty or dusty, the filler may not bond well with the surface. By cleaning and preparing the surface of the ceiling before applying the filler, you’ll be able to ensure that the filler bonds well with the surface and provides a smooth, even finish. Whether you’re filling small, hairline cracks or larger, more structural cracks, choosing the right filler is essential for achieving professional-looking results. By considering the adhesion of a filler, you’ll be able to find the best fillers for ceiling cracks that meet your needs and provide a long-lasting finish.
Color
Color is another important factor to consider when buying fillers for ceiling cracks. This refers to the color of the filler and how well it matches the color of the ceiling. Some fillers are available in a range of colors, while others may only be available in a single color. By choosing a filler that matches the color of the ceiling, you’ll be able to ensure that the filler blends in seamlessly and provides a smooth, even finish.
The color of a filler can also depend on the type of ceiling material. For example, if you have a white ceiling, you’ll want to choose a filler that is also white. On the other hand, if you have a colored ceiling, you’ll want to choose a filler that matches the color of the ceiling. By choosing a filler that matches the color of the ceiling, you’ll be able to ensure that the filler blends in seamlessly and provides a smooth, even finish. Whether you’re a DIY enthusiast or a professional contractor, choosing the right filler is essential for achieving professional-looking results and ensuring that the filler lasts for a long time.
Price
Finally, price is an important factor to consider when buying fillers for ceiling cracks. This refers to the cost of the filler and how it fits into your budget. Some fillers can be very expensive, while others may be more affordable. By choosing a filler that fits your budget, you’ll be able to ensure that you can afford to fill and seal your ceiling cracks without breaking the bank.
The price of a filler can also depend on the quality of the filler and the brand reputation. For example, high-end fillers from well-known brands may be more expensive than lower-end fillers from lesser-known brands. By choosing a filler that offers good value for the price, you’ll be able to ensure that you get a high-quality filler that meets your needs and provides a long-lasting finish. Whether you’re looking for the best fillers for ceiling cracks or just a good value, considering the price is essential for making an informed decision. With so many options available, it’s essential to do your research and choose the filler that best meets your needs and budget.
FAQs
What causes ceiling cracks and how can fillers help?
Ceiling cracks can be a real eyesore, and they’re often more than just a cosmetic issue. They can be a sign of a larger problem, like a leaky roof or foundation issues. But in many cases, ceiling cracks are simply the result of settling or shrinkage in the building materials. This is especially common in newer homes, where the materials are still adjusting to the environment. When you notice a crack in your ceiling, it’s essential to address it promptly to prevent further damage.
Using a filler is a great way to repair ceiling cracks, as it can help to stabilize the area and prevent the crack from spreading. Fillers can be made from a variety of materials, including spackling compound, joint compound, or even specialized products like polyurethane foam. When choosing a filler, consider the size and location of the crack, as well as the type of material your ceiling is made of. Some fillers are better suited for certain types of ceilings, so be sure to read the label and follow the instructions carefully. With the right filler and a bit of patience, you can say goodbye to that pesky ceiling crack and enjoy a smooth, even surface once again.
What types of fillers are available for ceiling cracks?
When it comes to filling ceiling cracks, you’ve got a lot of options to choose from. There are traditional fillers like spackling compound and joint compound, which are great for small, hairline cracks. These types of fillers are usually easy to apply and dry quickly, making them a convenient choice for DIY repairs. For larger cracks or more extensive damage, you may need a more heavy-duty filler, like a polyurethane foam or an epoxy-based product. These fillers are often more expensive, but they provide a stronger, more durable bond that can withstand a lot of stress and movement.
In addition to these traditional fillers, there are also some newer, more specialized products on the market. For example, some fillers are specifically designed for use on textured ceilings or for filling cracks in drywall. These products often have unique features, like built-in texture or a special adhesive that helps them bond to the surrounding material. When shopping for a filler, be sure to read the label and look for products that are specifically designed for your type of ceiling and the size of the crack you’re trying to fill. With so many options available, you’re sure to find a filler that meets your needs and helps you achieve a professional-looking finish.
How do I choose the best filler for my ceiling crack?
Choosing the best filler for your ceiling crack can seem overwhelming, especially if you’re not sure what type of material your ceiling is made of or how large the crack is. But don’t worry – with a little bit of knowledge and some careful consideration, you can make an informed decision and find the perfect filler for your needs. First, take a closer look at the crack and try to determine its size and location. Is it a small, hairline crack or a larger, more extensive gap? This will help you decide whether you need a lightweight, easy-to-apply filler or a more heavy-duty product.
Once you have a sense of the crack’s size and location, think about the type of material your ceiling is made of. Is it drywall, plaster, or something else entirely? Different fillers are better suited for different types of materials, so be sure to choose a product that’s compatible with your ceiling. You should also consider the color and texture of your ceiling, as well as any other factors that might affect the filler’s performance, like humidity or temperature fluctuations. By taking the time to assess your ceiling and choose the right filler, you can ensure a strong, lasting bond that will leave your ceiling looking smooth and even.
Can I use a filler on a ceiling with a popcorn texture?
If you’ve got a ceiling with a popcorn texture, you might be wondering whether you can still use a filler to repair cracks and damage. The good news is that yes, you can – but you’ll need to choose a filler that’s specifically designed for use on textured ceilings. These fillers usually have a special adhesive that helps them bond to the surrounding material, and they may also have a built-in texture that matches the popcorn finish. When shopping for a filler, look for products that are labeled as “textured ceiling fillers” or “popcorn ceiling fillers,” and be sure to read the instructions carefully before applying.
Using a filler on a popcorn ceiling can be a bit more challenging than using one on a smooth ceiling, but with the right product and a bit of patience, you can achieve a seamless repair. Just be sure to follow the manufacturer’s instructions and take your time when applying the filler, as it can be easy to create a mess or uneven texture. It’s also a good idea to practice on a small, inconspicuous area first to make sure you’ve got the hang of it. With the right filler and a bit of practice, you can repair cracks and damage on your popcorn ceiling and leave it looking like new.
How do I apply a filler to a ceiling crack?
Applying a filler to a ceiling crack is usually a straightforward process, but it does require a bit of patience and attention to detail. First, make sure the area around the crack is clean and free of dust or debris. This will help the filler bond to the surrounding material and ensure a strong, lasting repair. Next, read the instructions on the filler packaging and follow any recommended preparation steps, like sanding or priming the area. When you’re ready to apply the filler, use a putty knife or other spreading tool to fill the crack, working from one end to the other.
As you apply the filler, be sure to press it firmly into the crack, using a gentle but firm pressure. This will help the filler bond to the surrounding material and prevent air pockets or bubbles from forming. Once the filler is in place, use a damp cloth or sponge to wipe away any excess material and smooth out the surface. Depending on the type of filler you’re using, you may need to wait a few minutes or hours for it to dry before applying a second coat or finishing the area with paint or texture. By following the manufacturer’s instructions and taking your time, you can achieve a smooth, professional-looking finish that will leave your ceiling looking like new.
How long does it take for a filler to dry on a ceiling?
The amount of time it takes for a filler to dry on a ceiling can vary depending on the type of product you’re using, as well as the temperature and humidity of the surrounding environment. Some fillers, like spackling compound or joint compound, can dry in as little as 30 minutes to an hour, while others may take several hours or even overnight to fully cure. It’s essential to read the instructions on the packaging and follow any recommended drying times, as this will help ensure a strong, lasting bond and prevent any further damage to the surrounding material.
In general, it’s a good idea to wait at least 24 hours before painting or finishing the area, even if the filler feels dry to the touch. This will give the filler time to fully cure and bond to the surrounding material, ensuring a smooth, even finish that will last for years to come. If you’re unsure about the drying time or have any other questions, be sure to consult the manufacturer’s instructions or contact their customer support team for guidance. By following the recommended drying times and taking your time, you can achieve a professional-looking finish that will leave your ceiling looking smooth and even.
Can I paint over a filled ceiling crack?
Once you’ve filled a ceiling crack, you’ll probably want to paint over the area to match the surrounding surface. The good news is that yes, you can paint over a filled ceiling crack – but you’ll need to make sure the filler is fully dry and cured first. This will help ensure a strong, lasting bond and prevent any further damage to the surrounding material. When you’re ready to paint, use a high-quality primer and paint that’s specifically designed for ceilings, and apply it according to the manufacturer’s instructions.
Before painting, make sure the filled area is smooth and even, and use a light sanding to feather the edges and blend the filler with the surrounding material. This will help create a seamless finish that’s virtually invisible. When painting, work in small sections and use a roller or brush to apply the paint, depending on the texture and finish of your ceiling. By taking your time and following the manufacturer’s instructions, you can achieve a smooth, professional-looking finish that will leave your ceiling looking like new. Just remember to be patient and allow the paint to fully dry before inspecting the area or applying a second coat.
Final Verdict
As you stand back to admire your handiwork, you’ll feel an overwhelming sense of pride and accomplishment, knowing that you’ve successfully repaired those pesky ceiling cracks. It’s amazing how something as simple as a filler can completely transform the look and feel of a room, making it feel fresh and new again. With the right tools and a bit of patience, you can tackle even the toughest ceiling cracks and achieve professional-looking results. Whether you’re a seasoned DIY enthusiast or a beginner, the sense of satisfaction you’ll get from fixing those cracks is unbeatable.
Now that you’ve got the inside scoop on the best fillers for ceiling cracks, it’s time to take the plunge and start repairing those cracks once and for all. Remember, it’s all about finding the right product for your specific needs and taking your time to apply it correctly. With a little practice and patience, you’ll be a pro at fixing ceiling cracks in no time. So go ahead, grab your favorite filler, and get ready to say goodbye to those unsightly cracks and hello to a beautiful, smooth ceiling. You’ve got this, and with the best fillers for ceiling cracks on your side, you’ll be amazed at the incredible results you can achieve.