There’s nothing quite like the satisfaction of transforming a room with a fresh coat of paint, especially when it comes to those intricate details like trim. Remember the last time you decided to tackle a DIY project at home? You meticulously prepped the space, carefully taped around the edges, and then, with excitement bubbling, you reached for a brush to tackle the trim. But as you dipped that brush into the paint, a sinking feeling set in when you realized it wasn’t quite right for the job. Paint dripped, lines were uneven, and what should have been a flawless finish turned into a frustrating challenge.
Finding the best paint brushes for trim can make a world of difference in achieving that professional look – one that enhances your home and brings out the beauty of your paint job. With so many options on the market, it’s easy to feel overwhelmed, but fear not! In this guide, we’ll walk you through the top paint brushes that cater specifically to trim work, helping you elevate your DIY skills and creating a polished finish that you’ll be proud to show off. Let’s dive in and find the perfect brush that will turn your painting experience from a chore into a joy!
We’ll cover the best paint brushes for trim later in this article. Meanwhile, check out these related products on Amazon:


Last update on 2026-02-14 / #ad / Affiliate links / Images from Amazon Product Advertising API
Finding the Best Paint Brushes for Trim
Picture this: You’ve finally decided to give your home a fresh new look, and you’re ready to tackle the trim around your windows, doors, and baseboards. It’s a pivotal moment in your DIY journey—one that can set the tone for the entire space. You gather your supplies, but then it hits you: how do you choose the best paint brushes for trim? This seemingly simple task can make a world of difference when it comes to achieving that professional finish you aspire to.
When selecting the right brush for painting trim, it’s important to consider the material and size. Synthetic bristles often work best for water-based paints, while natural bristles are ideal for oil-based options. Did you know that using the right brush could cut your painting time in half? According to a study by the Paint Quality Institute, using high-quality tools results in better coverage, fewer brush strokes, and a smoother finish. So, investing in the best paint brushes for trim isn’t just a splurge; it’s a smart move for any home improvement project.
Beyond brush bristle type, the size of the brush plays a crucial role in the painting experience. Smaller brushes—think 1-2 inches wide—are best for tight corners and detailed work, while larger ones can speed up the process on flat surfaces. As you stroll through your local hardware store or browse online, remember that a well-chosen brush not only improves the finish but also enhances your control and precision. You’ll notice the difference as soon as you make that first stroke along the trim.
So, what should you look for when selecting the best paint brushes for trim? Consider ergonomic handles for comfort during prolonged use and look for brushes made with high-quality materials. Brush hairs that are both stiff and flexible allow for smooth application and straight lines. And don’t forget to read customer reviews—they’re often the best way to gauge how a product performs in real-life scenarios. With the right brush in hand, you’ll be well on your way to transforming your trim into an eye-catching feature of your home.
5 Best Paint Brushes For Trim
1. Purdy 144080230 Clearcut Angular Trim Brush
I remember the first time I took my Purdy Clearcut Angular Trim Brush out of the packaging; it felt like unboxing a secret weapon. The beautifully angled bristles made it easy to navigate around my baseboards and window frames, and I could finally paint without worrying about messy lines or splatters. Brushes that can stand up to both water-based and oil-based paints are hard to find, but this one managed to glide through both mediums with grace. I was amazed at how smoothly paint flowed off the bristles, and that fantastic finish made me feel like a professional.
After a couple of uses, I found that the brush retained its shape remarkably well. There’s something satisfying about knowing that I can keep using it without worrying about losing its pristine edge. Cleanup was a breeze too; just a quick rinse, and it was ready for the next round. With the way it handled those tight spots, my trim work has never looked better, and I discovered a new appreciation for the art of painting.
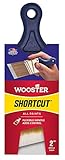
2. Wooster 2″ Shortcut Angle Sash Brush
The Wooster Shortcut Angle Sash Brush is a game-changer when it comes to tackling tricky corners. My first attempt at painting my kitchen trim was filled with frustration until I picked up this little gem. Its compact size made it a perfect fit for my hand, allowing me to maneuver around those awkward angles with ease. The paint picked up beautifully, and I loved how it mixed well with a variety of paints without clumping or streaking. Who knew painting could feel this effortless?
What I truly appreciate about this brush is its durable nylon and polyester mix, which has held up exceptionally well over multiple projects. I remember the brush gliding effortlessly along the edge of my cabinets and giving that clean, professional look I dreamed of achieving. After finishing up, washing it out was simple, and I found myself wanting to reach for it for every little touch-up. It transformed my painting process from a chore into something I look forward to doing!
3. Benjamin Moore 2″ Fluteless Trim Brush
When I first tried the Benjamin Moore Fluteless Trim Brush, I was pleasantly surprised by how much control I had. I had just painted my living room, and those challenging edges were making me grumble. But this brush turned everything around; it felt like an extension of my arm as I glided it along the trim. The fluteless design allowed me to get as close as possible without the risk of stray bristles leaving their mark on my freshly painted walls. It felt like I was dancing around the edges rather than fighting against them!
Another delightful discovery was how well it held onto paint. I found myself using less product than before, which made my project feel strangely efficient. Cleanup was just as satisfying; a quick rinse and the bristles returned to their original shape, ready for the next round. I’ve since completed several projects with this brush, and I can’t help but rave about how it has become my trusty sidekick in all my painting adventures.
4. Zibra Zibra Brush 1.5″ Angle Brush
Let me tell you about my experiences with the Zibra 1.5″ Angle Brush. The very first time I used it, I was pleasantly surprised by how comfortable it felt in my hand. It made tackling my living room trim a breeze! The angled shape is not just clever; it’s genius. I was able to reach those tight corners without worrying about getting paint everywhere. It brought a touch of joy to what could have been a tedious job!
One of the standout features for me was how easily it delivered an even finish with minimal effort. I’ve struggled with brushes that leave marks or clumps, but this one? No problem at all! Plus, it cleaned up without any fuss, which is such a relief when you’re eager to dive into your next project. This brush has truly transformed my relationship with painting trim—it’s no longer just a task on my to-do list but a chance to unleash a bit of creativity!
5. Ace 2″ Angle Trim Paint Brush
Using the Ace 2″ Angle Trim Paint Brush was like having an old friend help me with my painting projects. It felt familiar and surprisingly reliable the first time I picked it up. What I appreciated most was its excellent balance and the way it glided along the woodwork, making detailed work in my hallway easier than I could have imagined. The angled bristles made it so much easier to create those crisp lines, and I could almost hear my walls thanking me for the upgrade!
As I worked, I noticed how well it picked up paint without leaving any mess behind. It felt empowering to complete a project with such finesse! Even after cleaning, the Ace brush retained its shape beautifully, making me want to grab it again for all my trim needs. I’ve shared my newfound painting enthusiasm with friends, and we often joke about hosting ‘trim painting parties’ now that I’m equipped with such an amazing tool.
Why Do People Need to Buy Paint Brushes for Trim?
When it comes to painting, choosing the right tools is crucial for achieving a flawless finish, especially when it comes to trim work. Whether you’re freshening up your baseboards, window sills, or door frames, investing in the best paint brushes for trim can make all the difference. Imagine spending the weekend devoted to sprucing up your home, only to end up with rough edges and visible brush strokes because your brush wasn’t up to the task. Quality brushes are designed specifically for the intricate details and fine lines of trim, ensuring that you can transform your space with ease and professionalism.
Using a high-quality paint brush for trim not only enhances the appearance of your work but also saves you time in the long run. The right brush will hold the right amount of paint, allowing for even application and reducing the need for multiple coats. Picture this: You’re excitedly painting the edges of your well-loved living room, but halfway through you realize your brush isn’t doing the job. Instead of making progress, you’re left with drips and touch-ups, adding frustration to what should be a gratifying project. Selecting a premium brush tailored for trim helps avoid these nuisances, allowing you to complete your task smoothly and efficiently.
Furthermore, utilizing the best paint brushes for trim provides a sense of satisfaction and pride in your work. Imagine standing back and admiring your freshly painted trim, with clean lines that enhance the beauty of your space. It’s a rewarding feeling to know that your hard work paid off, and quality tools played a significant role in achieving that stunning outcome. Investing in superior paint brushes is not just about the task at hand; it’s about creating a space that reflects your personality and efforts.
Additionally, good paint brushes are built to last, meaning your investment pays off in durability and performance over time. Whether you’re an occasional DIYer or a seasoned painter, having reliable tools ensures that you can tackle projects as they come. Picture yourself pulling out that trusty trim brush again for a future project, still in top shape, like an old friend. Buying the best paint brushes for trim is more than just a purchase; it’s a commitment to quality, craftsmanship, and the joy of home improvement. So next time you’re in the paint aisle, remember the difference a good brush can make and choose wisely!
Understanding Different Brush Types for Trim Work
When it comes to painting trim, choosing the right type of brush significantly impacts the finish quality. There are several types of brushes available, including flat, angled, and round brushes. Each type serves a specific purpose and caters to different areas of trim work. For instance, angled brushes excel in providing precise lines along edges and corners, making them perfect for intricate details on baseboards and crown moldings.
Flat brushes, on the other hand, offer broader coverage, ideal for larger flat trims. Using flat brushes can help save time and ensure an even coat on wide surfaces. Round brushes are less common for trim work but can be useful for detailing or touching up rounded moldings. Understanding these brush types allows you to choose a brush that’s not only effective but also efficient for your specific project, ensuring you achieve that professional look you desire.
Ultimately, selecting the right brush type is about comfort and control too. A comfortable grip helps you maneuver the brush with ease, minimizing the risk of accidental splashes or uneven strokes. By understanding the characteristics of each brush type, you can make informed choices that align with your painting skills and project requirements, elevating the overall quality of your trim work.
Maintaining Your Paint Brushes for Longevity
Taking care of your paint brushes is crucial for maximizing their lifespan and maintaining their performance. After each use, it’s important to clean your brushes thoroughly, especially if you’ve been using a water-based or oil-based paint. For water-based paints, rinsing the brush under lukewarm water and lathering it with mild soap usually does the trick. For oil-based paints, you may need a solvent like mineral spirits to break down the paint.
Proper storage is just as important as cleaning. Storing brushes upright in a container or hanging them can prevent bristle deformation, ensuring they retain their shape for precise application in the future. If you find yourself in a situation where you can’t clean the brush right away, wrapping it in plastic wrap or aluminum foil can help keep the paint from drying out. These little steps can make a significant difference in maintaining your brushes, ultimately saving you money in the long run by prolonging their usability.
Imagine working on a multi-room painting project, where having reliable tools is essential for consistency. By establishing a routine for cleaning and storing your brushes, you can easily switch between rooms without the hassle of spending extra time cleaning or replacing tools. This time-saving tip can keep your workflow smooth and your results consistent, making your trim look stunning throughout your home.
Choosing the Right Paint for Your Trim
Selecting the right paint for your trim is just as crucial as choosing the right brushes. The finish of the paint can have a dramatic effect on the appearance and durability of the trim. High-gloss and semi-gloss finishes are popular choices for trim work, as they create a polished look while providing excellent durability. This is especially important in high-traffic areas where scuffs and scratches may occur frequently.
When deciding between different paint types, consider the material of your trim as well. Wood, for instance, may require a different formulation compared to PVC or composite materials. Additionally, the color choice can set the tone for your entire room. A classic white trim can brighten up a space, while dark colors might add drama and sophistication. Always test a small patch before committing to a final color, as lighting and wall colors can significantly affect the paint’s appearance.
Visualize walking into your freshly painted room; the right paint choice combined with quality brushes can make a significant difference in achieving that magazine-worthy finish. Not only does it elevate the aesthetics, but using the proper paint will also enhance the overall longevity and maintenance of your work, ensuring your trim continues to shine for years ahead.
Common Mistakes to Avoid When Painting Trim
Even seasoned DIYers can fall prey to common pitfalls when painting trim. One frequent mistake is neglecting to prepare the surface properly. Skipping sanding or priming can result in uneven application, where the paint clings poorly to the surface, leading to chipping or peeling down the line. A little prep work can significantly enhance the durability of your finish, saving you from frequent touch-ups in the future.
Another common blunder is choosing the wrong brush. Using a cheap or unsuitable brush can lead to bristle marks or uneven lines, compromising the overall look of your trim. It’s tempting to grab the first brush you find, but investing in quality brushes tailored for trim work will yield better results. More so, try to avoid cutting corners – patience is key. Rushing through applications can lead to drips and smudges, which can be frustrating to fix later.
In real-world scenarios, the difference between a stunning trim job and a mediocre one often lies in attention to detail. For instance, if you’re prepping for an important family gathering or selling your home, putting in the effort to avoid these common mistakes can pay off significantly. Your trim is often the first thing people notice, and perfecting it can enhance your home’s overall value and appeal, transforming spaces from ordinary to extraordinary.
Best Paint Brushes For Trim
When it comes to finishing touches on your home or project, using the right paint brush can make a world of difference. Choosing the best paint brushes for trim isn’t just about slapping some paint on a surface; it’s about getting that clean, crisp look that makes all your hard work shine. Whether you’re a seasoned DIY enthusiast or just starting out, selecting the right brush is critical for a polished finish. Let’s dive into seven key factors to consider when making your choice, so you can approach this task with confidence!
1. Brush Type
The first thing you want to consider is the type of brush that fits your project. Paint brushes generally come in two types: natural bristle and synthetic bristle. Natural bristle brushes are typically made from animal hair and are great for oil-based paints. They hold more paint and deliver a smooth finish, but they can be hard to clean. On the other hand, synthetic brushes are made from materials like nylon and polyester, making them ideal for water-based paints. They dry quickly and are easier to clean, making them a favorite among many DIY fans. Think about what type of paint you’ll be using and match it to the brush type for gorgeous, even results!
Additionally, the shape of the brush also matters. Angled brushes are perfect for getting into tight corners and edges commonly found on trim, while flat brushes are great for larger flat surfaces. So, assess your project’s specific requirements when picking the brush type; it will save you a lot of time and effort later on!
2. Size Matters
When selecting the best paint brushes for trim, consider the size of your brushes carefully. For trim work, smaller brushes are usually the best path to success. A 1.5-inch to 2.5-inch brush works wonders for most trim, but if you’re working on intricate designs or finer details, you might want to grab some smaller brushes. Choosing the right size not only makes it easier to control your strokes but also helps in minimizing any accidental paint spills on surrounding areas. No one likes unwanted drips!
Of course, your project’s unique features play a huge role in determining the right size. Have wide crown molding? You’ll want a slightly bigger brush for that pop of color. For small baseboards, a smaller brush will give you more precision. Trust me; investing in a couple of different sizes will make your life so much easier.
3. Bristle Quality
The quality of the bristles can be a game-changer when it comes to the paint application. High-quality bristles won’t shed, which means you can avoid those annoying brush hairs getting stuck in your beautiful finish. Brushes with fine filaments create a smoother application, which is crucial for that flawless trim look you desire. It’s like having a great friend who knows exactly how to do your hair perfectly; you want that finesse!
Additionally, high-quality bristle brushes have increased durability. While you might spend a bit more upfront, they can last through many projects and continue providing fantastic results over time. So, remember: investing in good-quality bristles means less hassle down the road, and who doesn’t want that?
4. Handle Comfort
Don’t underestimate the importance of a comfortable handle. If you’re tackling a big project, that little detail can actually make a world of difference. An ergonomic handle allows you to maintain a steady grip without tiring out your hand after prolonged usage. If you’ve ever tried to paint while your hand feels like cramping up, you know exactly what I mean! A comfortable handle means you can take your time and be precise in your work without the distracting fatigue of an uncomfortable grip.
Many brushes come with rubberized or contoured handles for extra comfort. When shopping, try holding it in your hand for a few moments. If it feels nice and balanced, you’ve likely got yourself a winner. After all, a little comfort goes a long way when perfecting those edges and details!
5. Price Point
As with any purchase, the price can be a significant factor. While you may be tempted to go for the cheapest option, consider the saying, “you get what you pay for.” The best paint brushes for trim often come with higher price tags, but they also offer better performance and durability. If you buy a few quality brushes instead of a pack of cheaper ones, you’ll save money in the long run by avoiding constant replacements.
It doesn’t mean you have to break the bank, though. Look for brands with a good reputation that balance quality and affordability. Sometimes, stores have sales or discounts on higher-end brands, so keep an eye out. Remember, your brushes are an investment in not just your project, but in your painting experience!
6. Maintenance Requirements
Knowing how much upkeep you want to do is vital when choosing your paint brushes. Some brushes require immediate cleaning after use to maintain their shape and quality, while others are more forgiving. Synthetic brushes can usually handle a quicker rinse without losing their shape, whereas natural bristle brushes may require thorough cleaning with special solutions. If you’re crafty but not overly fond of cleaning supplies, opt for a brush that meshes well with your lifestyle and cleaning preferences.
Also, consider how frequently you plan on using the brush. If you’re going to be painting often, investing in higher-quality brushes that withstand the test of time, including proper cleaning techniques, will be worth it. Taking care of your tools not only lets you have a cleaner workspace but ensures that they perform their best when you need them!
7. Brand Reputation
Finally, look into the brands you’re considering. Some brands have built up solid reputations over the years for producing the best paint brushes for trim. These companies often focus on innovation, leveraging technology to ensure their brushes perform at the top level. Plus, when a brand has numerous positive reviews, you can feel more confident in your choice. It’s like asking a friend for a recommendation—you want to know they’ve had a good experience!
You can check online reviews, speak to fellow DIYers, or even ask at your local paint or hardware store. Often, employees will have insight into which brands perform well and what to avoid. Don’t shy away from learning from the experiences of others to help guide your decision-making!
In summary, when choosing the best paint brushes for trim, remember to consider the type, size, bristle quality, handle comfort, price point, maintenance requirements, and brand reputation. Taking the time to think through these factors can elevate your painting project from tedious to downright enjoyable, leaving you with proud results. With the right brushes in hand, you’ll be ready to tackle any trim work with ease and finesse. Happy painting!
FAQ
What types of paint brushes are best for trim work?
When it comes to trim work, you’ll want to look for brushes that offer precision and a smooth finish. Synthetic bristle brushes are often the go-to choice because they hold paint well and provide excellent control. Flat brushes, particularly those that are 1 to 2 inches wide, are perfect for cutting in along edges and corners, ensuring a neat and tidy appearance. Some painters also prefer angled brushes, which can help to easily maneuver around intricate trim patterns.
Don’t forget about the size of the brush you’re using! A brush that is too large can lead to splatters and mistakes, while a brush that’s too small may take a lot longer to complete the job. So for optimal results, stick to brushes that are specifically designed for trim work and practice your technique to achieve that flawless finish you’re after.
How do I clean and maintain my paint brushes?
Cleaning your paint brushes after use is essential for maintaining their quality and longevity. The first step is to rinse the brush in warm soapy water if you’ve used water-based paint. Ensure that you gently work the bristles with your fingers to remove all the paint. For oil-based paints, it’s best to use a solvent like mineral spirits, but remember to follow safety guidelines when handling these materials.
Once the paint is off, reshape the bristles and let the brush dry flat or hanging. Regularly checking and cleaning your brushes will help keep them in top shape for years to come. It’s a simple task that goes a long way in ensuring that those beautiful trim projects don’t get marred by old, worn-out brushes!
Can I use a foam brush for trim painting?
Foam brushes can be handy for certain projects, but they’re not typically the best choice for detailed trim work. While they can provide a smooth finish, foam brushes may lead to uneven application and can easily absorb too much paint, resulting in a less-than-ideal outcome. They’re great for larger, flat surfaces or quick touch-ups, but for the precision required in trim painting, you’d be better off with a high-quality bristle brush.
If you’re set on using foam brushes, keep in mind that they might work for some specific trims or if you’re applying a particular type of finish. Just be sure to test it out on a small area first or use it mainly for backgrounds rather than those sharp, clean lines that define great trim work. Experiment and find what suits your style best!
How do I choose the right size brush for my trim?
The right brush size can make a huge difference in your trim painting project. For most trim work, a brush that’s 1 to 2 inches wide is ideal. This width allows you to navigate corners and edges comfortably without risking overspill. If your trim is intricate or has various profiles, you may want a mix of sizes to tackle different areas effectively.
Also, consider the type of finish you’re going for. If you’re using a thicker paint or a finish that requires more precision, a smaller brush may serve you better. Think about your comfort level and what feels best in your hand, as this can also affect your control and the final result. Trust your instincts, and don’t hesitate to grab a couple of sizes so you can choose as you work!
What are the benefits of using high-quality paint brushes for trim?
Investing in high-quality paint brushes can greatly enhance the outcome of your trim projects. Higher-quality brushes are made with superior materials, which means they hold more paint and provide a smoother, more even application. This not only makes your job easier but also saves you time on touch-ups and potential redoing of areas due to poor application.
Additionally, a well-crafted brush will retain its shape better and last longer, which ultimately translates to savings over time. You’ll appreciate the difference when you see the clean lines and flawless finishes, making your trim look professional without requiring a professional. Just think of it as a little extra investment in your home’s appearance that you won’t regret later on!
Can I use the same brushes for different types of paint?
While it’s tempting to use the same brushes for different types of paint, it’s best to avoid this practice for optimal results. Each paint type—be it water-based or oil-based—interacts differently with the materials in the brush. Using a natural bristle brush for water-based paint can cause the bristles to swell, leading to subpar performance and potentially damaging your tools.
For versatility, it’s worth having dedicated brushes for each type of paint. Labeling or organizing your brushes can help you easily grab the right one for your projects. That way, you keep the integrity of the brush and the quality of your finishes intact. Plus, it gives you peace of mind knowing you’re using the best tool for the job!
How do I avoid brush marks when painting trim?
Avoiding brush marks can often be a concern for those tackling trim painting, but with a few handy tips, you can achieve a beautifully smooth finish. First, using a high-quality brush specifically designed for trim work is crucial. Look for brushes that have fine, tapered bristles which help in distributing paint evenly and reducing visible stroke lines. Also, remember to load your brush well; a dry brush can create marks as it drags paint rather than glides over the surface.
Take your time when applying the paint, and use long, smooth strokes. Overworking the paint can lead to more brush marks, so find your rhythm and stick to it! If you’re working with a more thick or textured paint, consider thinning it slightly or using a paint conditioner to improve the flow. And don’t forget to allow each coat to dry completely before applying another—this can make a world of difference in the final appearance!
Final Thoughts
In the quest for the best paint brushes for trim, it’s clear that the right tools can make a world of difference in your painting projects. Whether you’re touching up your home or taking on a big renovation, having the right brushes at your fingertips not only ensures a clean and professional finish but also elevates the joy of transforming your space. So, take the knowledge you’ve gained from our reviews and buying guide and feel empowered to select the perfect brushes that fit your style and needs.
Remember, every stroke of the brush is a step towards creating the environment you’ve always envisioned. Embrace the process, unleash your creativity, and don’t hesitate to dive into your next painting adventure with confidence! With the right paint brushes for trim in hand, you’ll turn your dreams into reality and enjoy the satisfaction that comes with a job well done. Happy painting!