As the sun began to set over a cozy living room, a group of friends gathered for a movie night, laughter and excitement filling the air. The aroma of popcorn wafted through the room as they settled in, ready to enjoy their favorite film. However, as the opening credits rolled, they quickly realized that the sound was barely audible, drowning beneath the crackle of a low-quality speaker. Suddenly, someone chimed in with a spirited suggestion to kick the evening up a notch with a Raspberry Pi amplifier. Enthusiasm sparked as the group imagined the possibilities: rich, booming sound that could transform their humble setup into a cinematic experience worthy of a theater.
For anyone looking to elevate their audio game, the best Raspberry Pi amplifiers can be a game-changer. With so many options on the market, it might feel overwhelming to choose the right one that fits your needs and budget. Whether you’re a novice eager to explore DIY electronics or an audiophile in search of clarity and depth in sound, this guide will walk you through the top choices available today, ensuring that your sound system delivers an unforgettable audio journey. Grab your Raspberry Pi, and let’s dive into the world of amazing amplifiers that can revolutionize the way you enjoy music and movies!
We’ll cover the best raspberry pi amplifiers later in this article. Meanwhile, check out these related products on Amazon:


Last update on 2026-04-04 / #ad / Affiliate links / Images from Amazon Product Advertising API
Exploring the World of Raspberry Pi Amplifiers
Imagine this: you’ve set up your very own Raspberry Pi as a media center, streaming your favorite tunes or movies. But there’s one crucial element that suddenly feels lacking—an audio experience that truly captivates. This is where the best Raspberry Pi amplifiers come into play. These small yet powerful devices can dramatically enhance your sound output, turning a simple project into a fully-fledged audio system that rivals standard home setups.
You might be surprised to learn that more than 30% of Raspberry Pi users seek out audio solutions to complement their projects. Whether you’re a DIY enthusiast, a budding audiophile, or someone who just appreciates high-quality sound, the right amplifier can make all the difference. Leading brands and various models have emerged, offering an impressive array of features, from Bluetooth connectivity to advanced DAC technology, making it easier than ever to find a perfect match for your needs.
In choosing the best Raspberry Pi amplifier, it’s essential to understand not just the specs but also the practical aspects of each unit. Are you eyeing portability for a compact setup? Perhaps you desire more power for a home theater system. Many amplifiers boast power outputs ranging from as little as 5 watts per channel to more than 50 watts, catering to different requirements and environments. Reviews and user experiences can help illuminate which models truly resonate with the community while providing the sound quality you crave.
At the end of the day, diving into the world of Raspberry Pi amplifiers is not just a technical endeavor; it’s about enhancing your life with better sound. As we explore the top contenders, you’ll discover options for every budget and preference, and hopefully find your perfect audio companion. So, grab your Raspberry Pi, and let’s amp up your audio adventure!
Top 5 Best Raspberry Pi Amplifiers
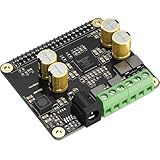
1. HiFiBerry Amp2
When I first delved into the world of DIY audio projects, the HiFiBerry Amp2 quickly caught my attention. I remember unboxing it and being pleasantly surprised by its sleek design—perfect for my Raspberry Pi setup. After connecting it, I eagerly streamed my favorite playlists. The sound was absolutely mesmerizing, bringing my music to life with crystal-clear highs and deep, rich lows. It felt like having a live concert in my living room!
What really stood out to me was how easy it was to integrate the Amp2 with my Raspberry Pi. Within minutes, I was enjoying music without any annoying delays or complicated setups. The compact size made it seamless to fit into my existing system. Whether I was jamming to classic rock or diving into an atmospheric indie album, the Amp2 offered the kind of audio quality that made my heart race. It’s now a staple in my home, turning every listening session into an experience I look forward to!
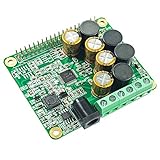
2. IQaudio Pi-DAC+ Amplifier
The IQaudio Pi-DAC+ was a game changer for my home audio experience. I remember that moment when I first connected it to my Raspberry Pi and hit play. The sound quality was like flipping a switch from mediocre to downright phenomenal. It brought out nuances in the music I had never truly appreciated before, making my favorite songs feel fresh and new all over again. It was as if I could hear each instrument distinctly, adding layers to my listening experience.
Setting it up was a breeze, and I found myself getting lost in my music for hours on end. The Pi-DAC+ not only looks stylish sitting next to my Raspberry Pi, but it also has this wonderful ability to make even the most casual playback feel like a grand concert. Friends have often commented on the sound quality during gatherings, and I couldn’t resist showing off my DIY audio skills. In the end, this little gem redefined my home audio setup, turning it into the perfect space for relaxing and entertaining alike.
3. Nobsound G2s Mini Amplifier
When I stumbled upon the Nobsound G2s Mini Amplifier, I was intrigued by its promise of powerful sound in a compact package. I still vividly remember my first test—it was late one evening, and I was ready to unwind with some jazz. As the music filled the room, I couldn’t believe how clear and warm the sound was, especially considering its size! The bass was rich enough to make me tap my feet, while the treble sparkled without being harsh. I felt transported, as if I were sitting right in front of the band.
What makes the G2s truly special is how portable it is. It’s so small that I easily moved it around my home, giving me great flexibility. I set it up in different rooms just to experience how it adapted and filled the space. Whether I used it for movie nights or spontaneous dance parties, the G2s never let me down. This little amplifier has proven to be a real companion in enhancing my Raspberry Pi audio adventures, ensuring I enjoy high-quality sound wherever I am!
4. Topping MX3 Amplifier
The Topping MX3 Amplifier quickly became one of my best discoveries for my Raspberry Pi setup. I remember getting it ready for an afternoon of music, and as soon as I pressed play, the clarity blew me away. I was treated to a balanced, airy sound that made it feel like the artist was right there with me. It became my go-to device for relaxing evenings and impromptu listening sessions with friends, as chatter faded away, replaced by beautiful melodies.
Setting it up was almost effortless, and I couldn’t help but admire the elegant design perched alongside my other audio gear. With multiple input options, I found myself exploring different ways to enjoy sound, connecting not just my Raspberry Pi but also other devices. The versatility of the MX3 shone through every time, allowing me to explore everything from mellow acoustic sets to upbeat electronic tracks. Each listening experience was simply delightful, providing an escape whenever I needed it most.
5. Pyle Mini Audio Amplifier
The Pyle Mini Audio Amplifier has an undeniable charm that quickly captured my heart. It was one of those impulse buys that turned out to be a hidden gem! I remember the first time I plugged it into my Raspberry Pi. The tiny but mighty device filled my entire living room with vibrant sound, making my Jazz playlists sound like they were being performed live. It was immensely satisfying to hear every note and nuance, ensuring that my music rituals were truly top-notch!
One of the best features is its portability. During a weekend get-together, I decided to bring the Pyle along outside. Much to my surprise, it easily powered my speakers, creating the perfect atmosphere for friends and family to gather. It turned out to be the life of the party! Everyone was impressed with the sound quality, asking how such a small device could crank out such heartwarming tunes. This amplifier has become a crucial part of my audio setup, proving that great sound doesn’t always come in large packages!
Why People Need to Buy Raspberry Pi Amplifiers
Imagine a cozy evening at home with friends, where the ambiance is set perfectly with your favorite playlist playing in the background. The sound emanating from your Raspberry Pi setup fills the room, but something feels off—the music lacks that depth and punch you’ve come to love from your favorite tracks. This is where a Raspberry Pi amplifier comes in; it transforms your digital setup into a robust audio system, delivering rich sound quality that everyone can enjoy, making your gatherings unforgettable.
The versatility of Raspberry Pi amplifiers is a huge draw for tech enthusiasts and casual users alike. Whether you’re an aspiring DJ, a budding musician, or someone who simply loves to entertain, these amplifiers take your audio experience to the next level. They can boost the output of your media player, turning it into a powerful sound system. This means you can create a mini concert experience in your living room, atop a bustling rooftop, or even during a picnic at your favorite park. Imagine the convenience of having high-quality sound wherever you go!
With so many options available, investing in the best Raspberry Pi amplifiers can seem like a daunting task. However, the right amplifier can significantly enhance your sound, bringing clarity to instruments and adding warmth to vocals. These devices are often easy to set up and integrate seamlessly with your Raspberry Pi projects. Plus, many amplifiers are compact and energy-efficient, allowing you to create a powerful audio experience without cluttering your space or overloading your power supply. It’s a win-win for any tech-savvy homeowner or maker!
Finally, the affordability of Raspberry Pi amplifiers makes them accessible to a wide array of users. You don’t need to break the bank to achieve quality sound. Think about it: for a fraction of the cost of traditional audio systems, you can build your own custom audio experience using a Raspberry Pi and a well-suited amplifier. This is more than just an investment in equipment; it’s a gateway to unleashing your creativity, gathering your loved ones, and enjoying every moment with high-fidelity sound. So why wait? Elevate your audio journey today!
Understanding Different Amplifier Types
When diving into the world of Raspberry Pi amplifiers, it’s crucial to distinguish among the various types available. Class-D amplifiers, for instance, are known for their efficiency and compact size, making them a popular choice for users looking to power their DIY audio projects without taking up too much space. If you’re setting up a retro gaming console, a Class-D amplifier can provide high-quality sound without generating excessive heat, allowing you to enjoy long gaming sessions without any worry.
On the other hand, Class AB amplifiers may appeal to audiophiles who prioritize sound quality. These amplifiers tend to deliver better audio fidelity and are often the choice for home theater setups or music production. Imagine hosting a movie night with friends or jamming out at home. In these scenarios, choosing a Class AB amplifier can enhance your listening experience, ensuring that every note and dialog is crisp and clear.
Ultimately, the type of amplifier you choose will depend on your specific needs. If portability and efficiency are key, a Class-D amplifier is your best bet. But if you’re seeking rich sound quality for high-caliber audio projects, consider investing in a Class AB option. Understanding these differences will empower you to make an informed decision that fits your musical lifestyle.
Integrating Raspberry Pi Amplifiers with Other Devices
Integrating your Raspberry Pi amplifier with various devices opens up a world of possibilities, from creating a complete home theater system to building a portable speaker. One common use case is connecting your amplifier to a Raspberry Pi that streams music from services like Spotify or your personal library. Imagine being able to play your favorite tunes through high-quality speakers, all controlled from the convenience of your smartphone. It’s an excellent setup for hosting parties or simply unwinding at the end of a long day.
Another exciting integration option is pairing your amplifier with a desktop PC or a laptop. This configuration allows you to enhance your gaming or movie-watching experience significantly. If you’ve ever played a game with subpar audio, you know how immersion can suffer. By connecting your Raspberry Pi to an amplifier, you can dramatically improve sound quality, bringing the action to life and making it much more engaging. You may even find it helps you catch those important cues that enhance gameplay.
Moreover, you can easily combine Raspberry Pi amplifiers with home automation systems. Picture this: walking into your living room, and as you settle in, your Raspberry Pi-controlled speakers automatically adjust to the perfect volume while playing your favorite playlist. Integrating your amplifier into a smart home setup allows for unique and tailored experiences, making your audio enjoyment as seamless and enjoyable as possible.
DIY Projects Using Raspberry Pi Amplifiers
If you’re a DIY enthusiast, Raspberry Pi amplifiers can unlock a treasure trove of creative projects. One popular project is creating a custom sound system for outdoor gatherings or backyard movie nights. By combining your Raspberry Pi with an amplifier, Bluetooth speakers, and a projector, you can turn your backyard into an entertainment hub. Just imagine setting up a screen under the stars, with rich sound projecting from your DIY audio system—it’s bound to impress friends and family!
Another fun project is building a smart assistant powered by your Raspberry Pi and an amplifier. You can enhance a simple voice assistant setup by integrating sound output that brings your device to life. This project can serve as a great learning opportunity as you explore programming and hardware integration. When you ask your assistant for the weather, not only will it respond, but it will do so with clear audio output, making it feel much more interactive and engaging.
Then there’s the potential for creating educational tools. Many educators harness Raspberry Pi amplifiers to enable engaging sound experiences, such as enhancing language learning with audio playback. By crafting a device that uses clear, rich sound, educators can boost student engagement, making learning dynamic and exciting. With a bit of creativity, your Raspberry Pi amplifier could play a crucial role in enriching the educational journey for many.
Optimizing Sound Quality in Your Setup
No one wants to settle for mediocre sound quality, especially when investing in a good Raspberry Pi amplifier. To optimize audio performance, start by choosing the right speakers to pair with your amplifier. Match the wattage and impedance to ensure they work harmoniously. Imagine being in the middle of a movie scene with every sound effect being crystal clear, thanks to the well-chosen speakers—a pleasure for any cinephile!
Another key factor to consider is the placement of your components. Many users overlook how positioning affects sound. If you’re setting up speakers, avoid placing them in corners or against walls, as this can create echoes or muddy audio. Instead, try to position your speakers at ear level, providing a more balanced sound experience. Picture hosting a game night, and your friends are wrapped up in the excitement, all thanks to optimal sound placement enhancing the thrilling atmosphere.
Finally, don’t underestimate the importance of software settings. Using software like Volumio or Kodi can make a massive difference in how sound is processed and output. Adjusting equalizer settings to suit your audio preferences is essential, too—some users prefer richer bass, while others may want clearer treble. Personalizing your audio experience will allow you to enjoy every nuance in your favorite songs or films, making the effort well worth it.
Best Raspberry Pi Amplifiers Buying Guide
Hey there! If you’re diving into the world of Raspberry Pi and audio projects, you’re likely considering how to amplify your sound effectively. Choosing the right amplifier can make a big difference in how your audio projects sound and perform. Whether you’re planning to set up a home media center, create a retro gaming console with great sound, or even craft a mini internet radio station, finding the best Raspberry Pi amplifiers is key. So, let’s chat about some important factors to consider when you’re on the hunt. Think of this as a friendly guide that helps you make the best choice for your needs!
1. Power Output
When you’re shopping for amplifiers, one of the first things to check is the power output. The more power an amplifier can push, the louder and clearer your audio will be. It’s essential to match the amplifier’s power with your speakers to avoid any distortion or sound quality loss. Most Raspberry Pi projects are connected to speakers that don’t require an excessive amount of power; however, knowing how much wattage your setup needs is crucial.
For instance, if you’re using small bookshelf speakers, an amplifier with around 10 to 20 watts per channel might suffice. But if you’re connecting to larger floor-standing speakers, you might need something with 50 watts or more. It’s all about finding that balance, so take a moment and really think about your audio setup needs before you buy one of the best Raspberry Pi amplifiers!
2. Connectivity Options
Next up on our list is connectivity options. You might be asking yourself, “How will I connect my Raspberry Pi to the amplifier?” Different amplifiers come with various input methods, including Bluetooth, USB, RCA, and optical. Depending on your project, certain input methods might be more beneficial than others.
If you’re looking for a wireless setup, a Bluetooth amplifier can make your life a whole lot easier. On the other hand, if you’re a fan of higher fidelity audio, you might want to go with an amplifier that offers optical or USB input. Whatever your preference, make sure to check the connectivity features before making that final purchase on one of the best Raspberry Pi amplifiers. You want to ensure it fits seamlessly into your project!
3. Size and Form Factor
Let’s talk about size and form factor next. Depending on where you plan to use your Raspberry Pi and amplifier, size could be a deciding factor. If you’re setting up a compact media station or working with limited space, a mini amplifier or one with a small footprint might be ideal for you.
Alternatively, if you’re creating a larger audio system for your living room, you may want a more robust amplifier. There are even some power amplifiers that fit neatly into a rack. Always consider where your amplifier will sit and how much space you have to work with to ensure a perfect fit for your setup.
4. Audio Quality
Of course, audio quality is a crucial factor. After all, what’s the point of an amplifier if it doesn’t provide good sound? Look for amplifiers that support high-resolution audio formats if you’re a true audiophile gearing up for high-quality streaming. Specifications like total harmonic distortion (THD) and signal-to-noise ratio (SNR) can tell you a lot about an amplifier’s quality.
Make sure to check user reviews as well. Sometimes, consumers share their experiences regarding sound quality, which can give you insights beyond the technical specs. You want the best Raspberry Pi amplifiers for your audio adventures— so listen to what others say and ensure the one you choose not only meets but exceeds your expectations.
5. Heat Management
Another aspect that’s often overlooked is heat management. Powerful amplifiers can generate heat, which can lead to performance issues or even damage over time. So it’s crucial to consider how well an amplifier dissipates heat, especially if you plan for long listening sessions.
Check if the amplifier has heatsinks or fans and how they operate. Some high-end models come with elaborate cooling systems to ensure reliable performance. Paying attention to how an amplifier manages heat can save you a lot of trouble down the line, so don’t skip this step when searching for the best Raspberry Pi amplifiers!
6. Build Quality and Durability
Now, let’s chat about build quality. A great amplifier should not only sound good but also be built to last. Examine the materials used in the construction of the amplifier. Does it feel sturdy? Are the knobs and connections solid? A well-built amplifier can withstand the test of time and regular use without degrading in performance.
Take a moment to read reviews focusing on the durability of the amplifier you’re considering. You don’t want to invest in something that may break down after a few uses. A solid build ensures you’re getting one of the best Raspberry Pi amplifiers out there, and it gives you peace of mind knowing your setup is safe and sound!
7. Price and Budget
Finally, let’s touch on price and budget. Amplifiers can range from budget-friendly to more premium options, so it’s essential to figure out what you’re willing to spend. Establish a clear budget before you start shopping. This will help narrow down your options and prevent you from overspending.
Keep in mind that a higher price doesn’t always guarantee better quality. Make sure to get one that suits your specific needs within your budget. Also, don’t forget to check for sales, bundles, or second-hand options—sometimes you might find that perfect model at a price that fits nicely into your pocket!
In conclusion, finding the best Raspberry Pi amplifiers is a journey that involves considering several factors, including power output, connectivity options, size, audio quality, heat management, build quality, and overall price. By keeping these criteria in mind, you’re more likely to end up with an amplifier that not only amplifies sound but truly enhances your audio experience. So happy shopping, and may your audio projects sound fantastic!
Frequently Asked Questions
What should I consider when choosing a Raspberry Pi amplifier?
When selecting a Raspberry Pi amplifier, it’s essential to consider a few key factors that will ensure you get the best sound experience for your setup. Start by evaluating the power output and impedance rating of the amplifier. This will determine how well the amplifier can drive your speakers and deliver quality sound. It’s also a good idea to check compatibility with your Raspberry Pi model, as some amplifiers might require additional setup or accessories for optimal performance.
Next, think about the features you want. Do you need Bluetooth connectivity for wireless streaming, or do you prefer the reliability of a wired connection? Some amplifiers come with built-in equalizers or specific sound presets that can enhance your listening experience. Finally, consider your budget as there’s a wide range of amplifiers available at various price points, so you can find one that offers great value without breaking the bank.
Can I use any speakers with a Raspberry Pi amplifier?
Yes, you can use a wide variety of speakers with a Raspberry Pi amplifier, but it’s important to match the speaker’s specifications to the amplifier’s output capabilities for the best sound quality. Always check the impedance and power ratings of both the amplifier and the speakers to ensure they work well together. For example, if the amplifier is rated at 4 ohms, using speakers that are also 4 ohms will produce the best results.
Additionally, pay attention to the speaker type, whether they’re passive or active. Passive speakers will need to be connected to an amplifier, while active speakers come with built-in amplifiers and can often connect directly to the Raspberry Pi. Compatibility is crucial here, so take a moment to confirm that your speakers will provide the sound quality and volume you’re looking for when combined with your amplifier.
Do I need additional components when setting up a Raspberry Pi amplifier?
In most cases, you may need a few additional components to set up your Raspberry Pi amplifier effectively. At the very least, you’ll need speaker wires to connect your amplifier to your speakers. Depending on the setup you choose, you may also want to consider a power supply to ensure your amplifier has enough power to perform optimally. Some amplifiers might also require a heatsink if they’re likely to run hot during operation, so that’s something to keep in mind.
You might also consider adding a case or enclosure for your Raspberry Pi and amplifier combination. This can help protect your devices from dust and damage while also keeping everything neat and organized. It’s also worth looking into cables that fit your specific setup, like HDMI or RCA cables, to make connections straightforward and efficient. Having these components on hand will lead to a smoother setup process and a better audio experience.
Are Raspberry Pi amplifiers compatible with all audio sources?
Raspberry Pi amplifiers typically work well with a variety of audio sources, but compatibility depends on the specific design of the amplifier and the types of connections it supports. Many popular amplifiers are designed to connect directly with Raspberry Pi and other devices via a 3.5mm jack, HDMI, USB, or even Bluetooth, allowing you to easily integrate them into your audio system. However, it’s always wise to check the specifications of both your amplifier and your audio source to ensure seamless compatibility.
If you’re looking to use your Raspberry Pi with other sources, like a computer or mobile device, confirm that the amplifier supports those types of connections. In some cases, you might need adapters or specific cables to bridge the gap. Once you ensure compatibility, you’ll be free to enjoy a rich and versatile audio experience without any hiccups!
What are the advantages of using a Raspberry Pi amplifier over traditional amplifiers?
Using a Raspberry Pi amplifier offers several advantages, particularly in terms of versatility and customization. One significant benefit is the ability to program and tailor your Raspberry Pi setup to your specific audio needs. You can install different audio software, access various streaming services, and even implement unique sound processing algorithms that you wouldn’t typically find in traditional amplifiers. This kind of flexibility makes it an exciting choice for hobbyists and audiophiles alike.
Additionally, Raspberry Pi amplifiers often take up less space and are more affordable than many traditional stand-alone amplifiers. Most models are compact and lightweight, making them a great fit for DIY projects or home audio systems where space is at a premium. Plus, because the Raspberry Pi community is vibrant and extensive, you often have access to a wealth of resources for troubleshooting, upgrades, and modifications, ensuring your audio setup remains fresh and engaging.
Can I use my Raspberry Pi amplifier for outdoor setups?
Absolutely! Many Raspberry Pi amplifiers can be effectively used in outdoor setups, just as long as you consider a few important factors. For starters, you’ll want an amplifier that can deliver sufficient power to cover the outdoor environment, especially if you plan to entertain guests or enjoy a bit of music while relaxing outside. Additionally, ensure that the amplifier is placed in a protected area where it won’t get wet or subjected to extreme weather conditions.
Also, think about your speaker choices for outdoor use. Waterproof or weather-resistant speakers are always a smart option to ensure durability and longevity in an outdoor setting. Pairing a robust outdoor setup with your Raspberry Pi amplifier can create an enjoyable audio experience in your backyard, patio, or even during camping trips, allowing you to take your favorite tunes wherever you go!
How do I troubleshoot common issues with my Raspberry Pi amplifier?
Troubleshooting issues with your Raspberry Pi amplifier can feel daunting, but often, it’s just a case of checking a few straightforward things. First, verify that all connections are firmly in place. Loose cables can lead to poor sound quality or no sound at all. Ensure your amplifier is powered on, and if it has any indicator lights, check that they are functioning as intended. Don’t forget to double-check your volume settings both on the Raspberry Pi and the amplifier itself—sometimes the simplest fixes make all the difference!
If everything seems connected properly but you’re still facing issues, it might be worth looking into the software settings on your Raspberry Pi. Ensure that the appropriate audio output is selected, especially if you have multiple audio sources connected. If the problem persists, consider updating your Raspberry Pi software or checking online forums for advice from others who may have encountered similar issues. Remember, troubleshooting is often about patience and methodically going through possible fixes, so take a breath and dive in!
Final Words
As we wrap up our exploration of the best Raspberry Pi amplifiers, it’s clear that unlocking the potential of your Raspberry Pi has never been more exciting. With so many incredible options available, you’re poised to transform your audio projects into sonic masterpieces. Whether you’re a tech novice or a seasoned maker, there’s an amplifier that will perfectly fit your needs. Each choice has its unique features and strengths, empowering you to create amazing soundscapes right from the palm of your hand!
Remember, the journey of working with Raspberry Pi is about experimentation and creativity. Don’t be afraid to dive in, try different setups, and discover what resonates with you. You have the tools and knowledge to make informed decisions—so go forth and amplify your passion! Embrace the adventure ahead as you make your pick from the best Raspberry Pi amplifiers, and get ready to bring your audio ideas to life!